Make your own patch for VitaGrafix
WARNING I use Linux as my main OS, I do not know if any of this will work on Windows or MacOS! WARNING
Link I use to find game ID’s: https://renascene.com/psv/list
Table of contents
- What is VitaGrafix?
- Requirements
- How do I begin?
- Obtaining the ELF file with FAGDec
- Setting up Ghidra
- Patching VitaLoaderRedux
- Making a new project in Ghidra
- Importing the ELF file into Ghidra
- Finding the codes that lock FPS
- Testing the game
- EXTRAS – IMPORTANT!!!!!!
What is VitaGrafix?
Copied from their github repo
VitaGrafix is a taiHEN plugin that allows you to change resolution and FPS cap of PS Vita games (to get better visuals, higher FPS or longer battery life).
Requirements
- A hacked PSVita
- FAGDec
- VitaShell
- Ghidra
- VitaLoaderRedux
- VitaSDK Documentation
- Paru AUR Helper
- Patience, a lot of it
How do I begin?
A question I often ask myself when I start something new, how do I begin? You don’t have to be a programmer or hacker to make your own patches, really. All you need is a hacked PSVita, patience and the ability to read and understand the VitaSDK documentation and maybe some good drink.
I expect you to have a hacked PSVita and have a basic knowledge of VitaShell and installing apps.
Let me help you get started!
Obtaining the ELF file with FAGDec
Download FAGDec and install it via VitaShell.
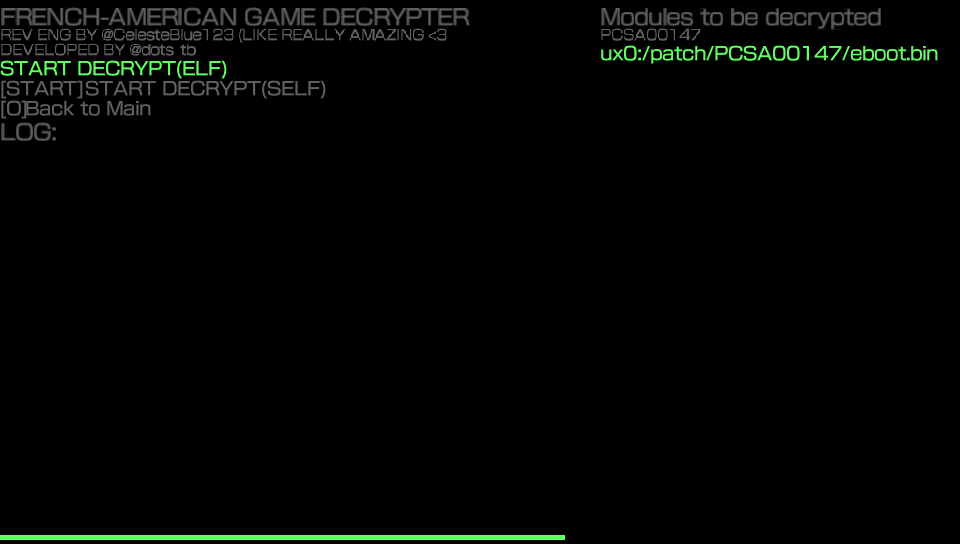
This is what you will see when you first open FAGDec
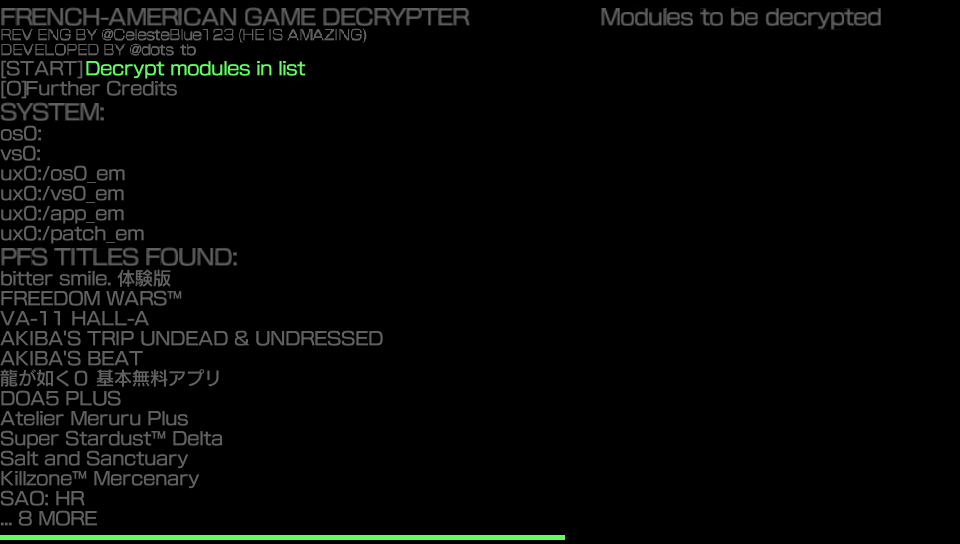
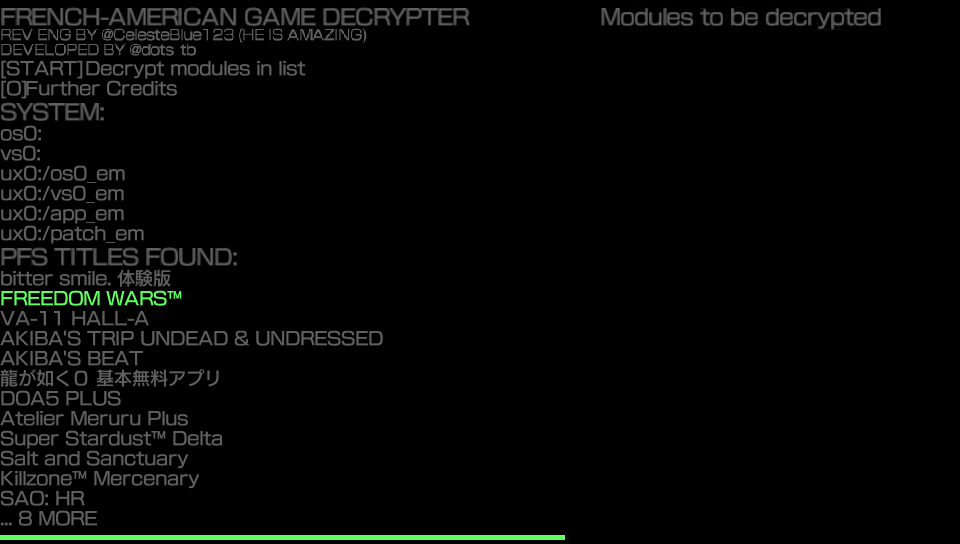
Select the game you want to work on and press X.
If there is a patch installed, get the patch eboot.bin instead. There’s a big chance that the code we gotta patch is in there. Select it with X and it should appear on the right side of the screen like so
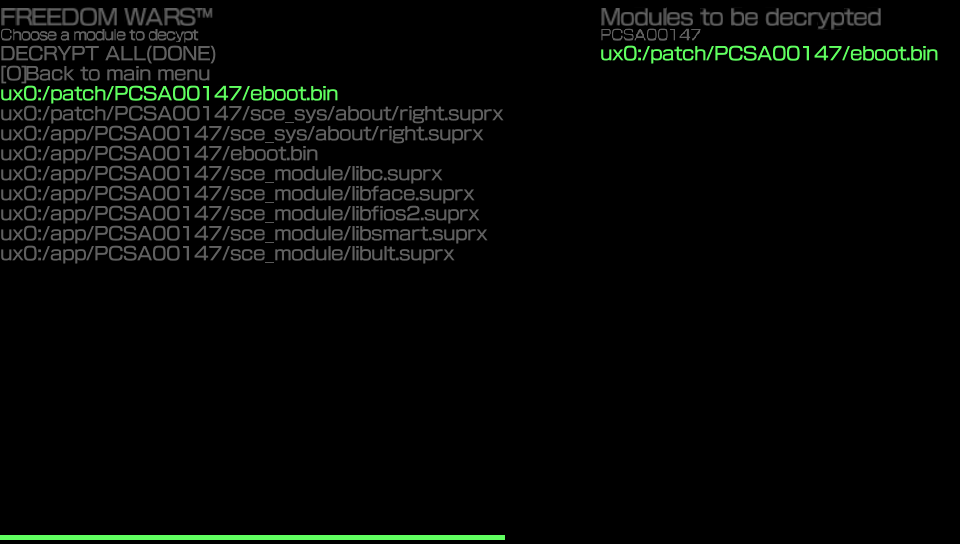
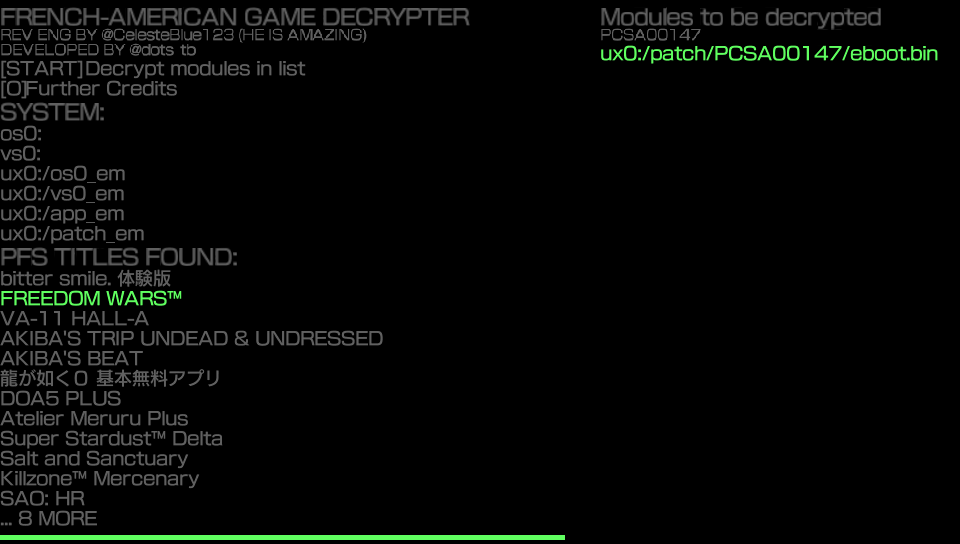
Now press the O button to go back and you will see this
Now we click on the START button on the PSVita and will see this.
Click on START DECRYPT(ELF)
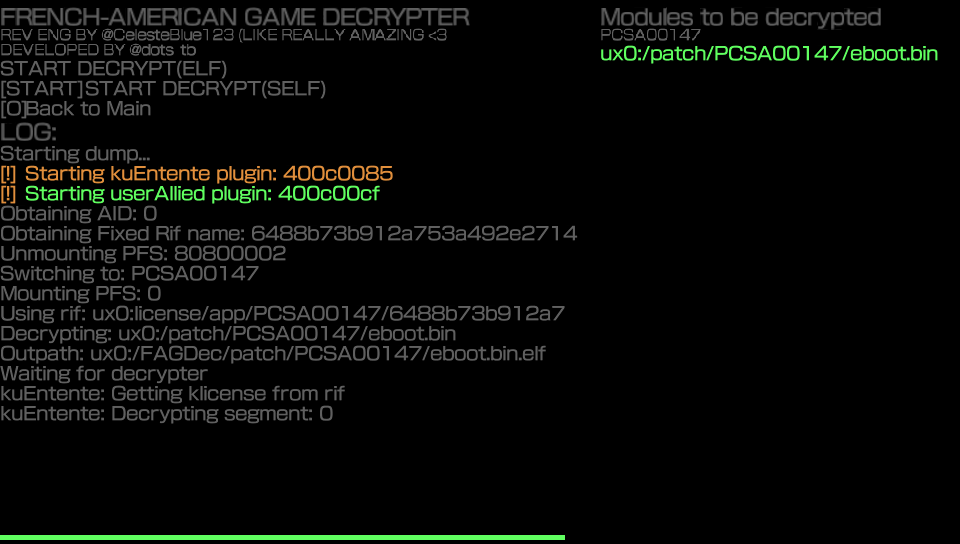
This is the screen during decryption
When the decryption is done, you will see this
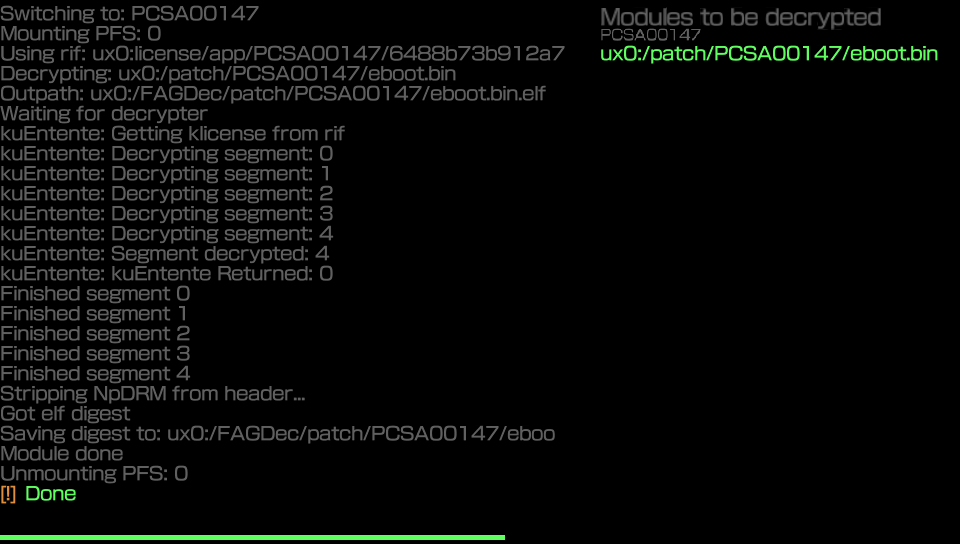
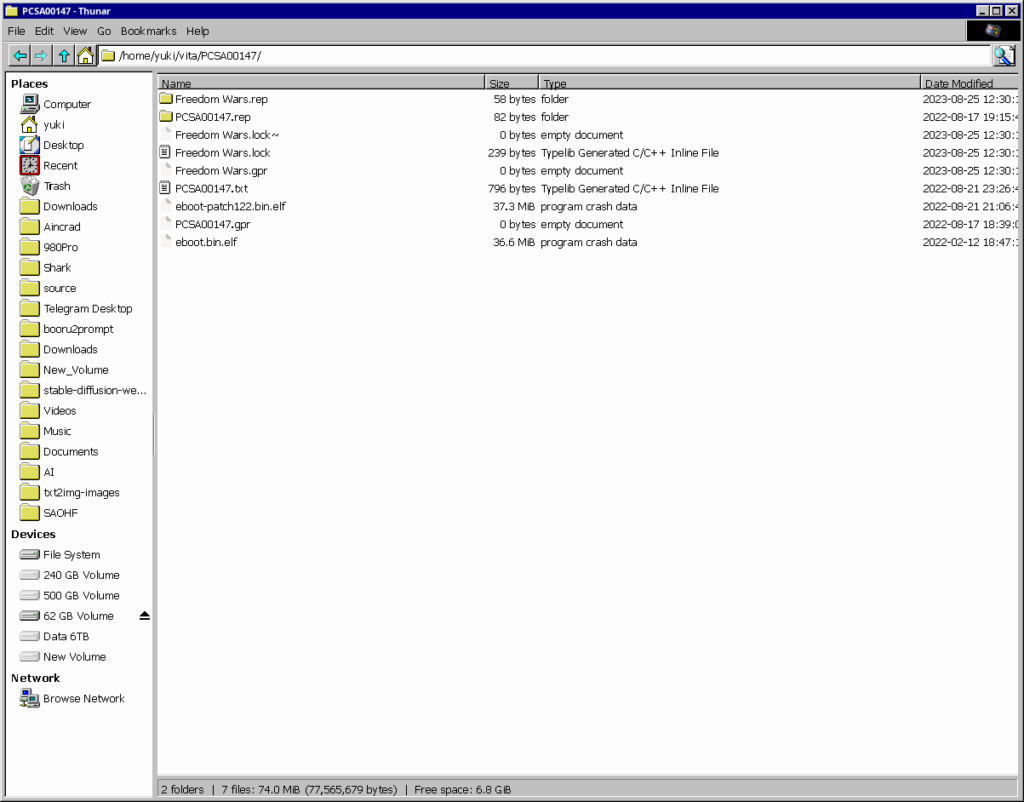
The file is now decrypted and stored on the PSVita at: “ux0:FAGDec/patch/PCSA00147/eboot.bin.elf”
To Copy the elf file from your PSVita to your pc, start VitaShell again and connect your vita to your computer (or you can use FTP, either way works).
Copy the file to your local pc so we can import it in Ghidra later.
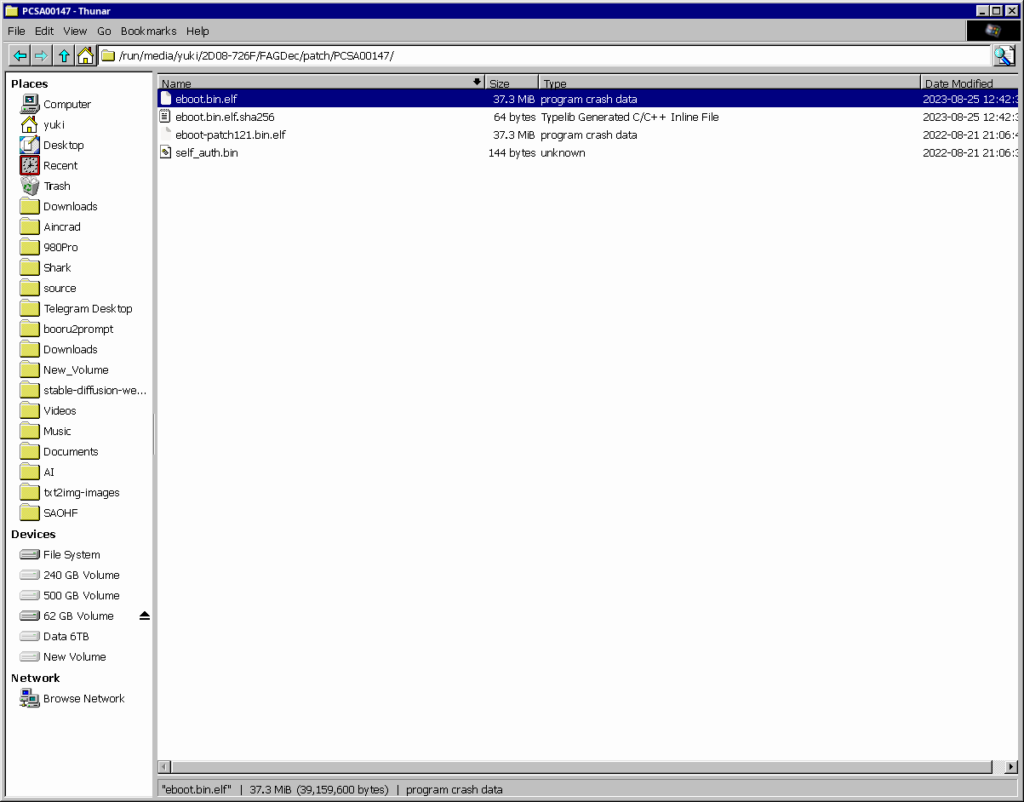
My folder has a few more files in it, because of it being an older project I worked on before.
Installing Ghidra
o begin, we are going to install Ghidra and the required extension.
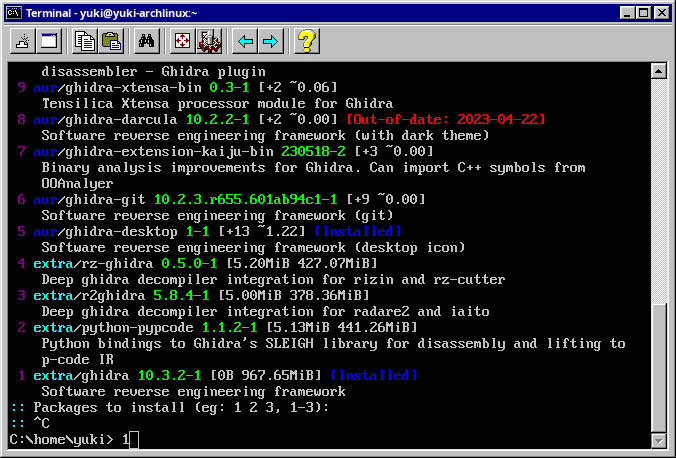
Open a terminal and execute the following:
paru ghidra And select extra/ghidra
Setting up Ghidra
Download the VitaLoaderRedux plugin, you do not have to extract it.
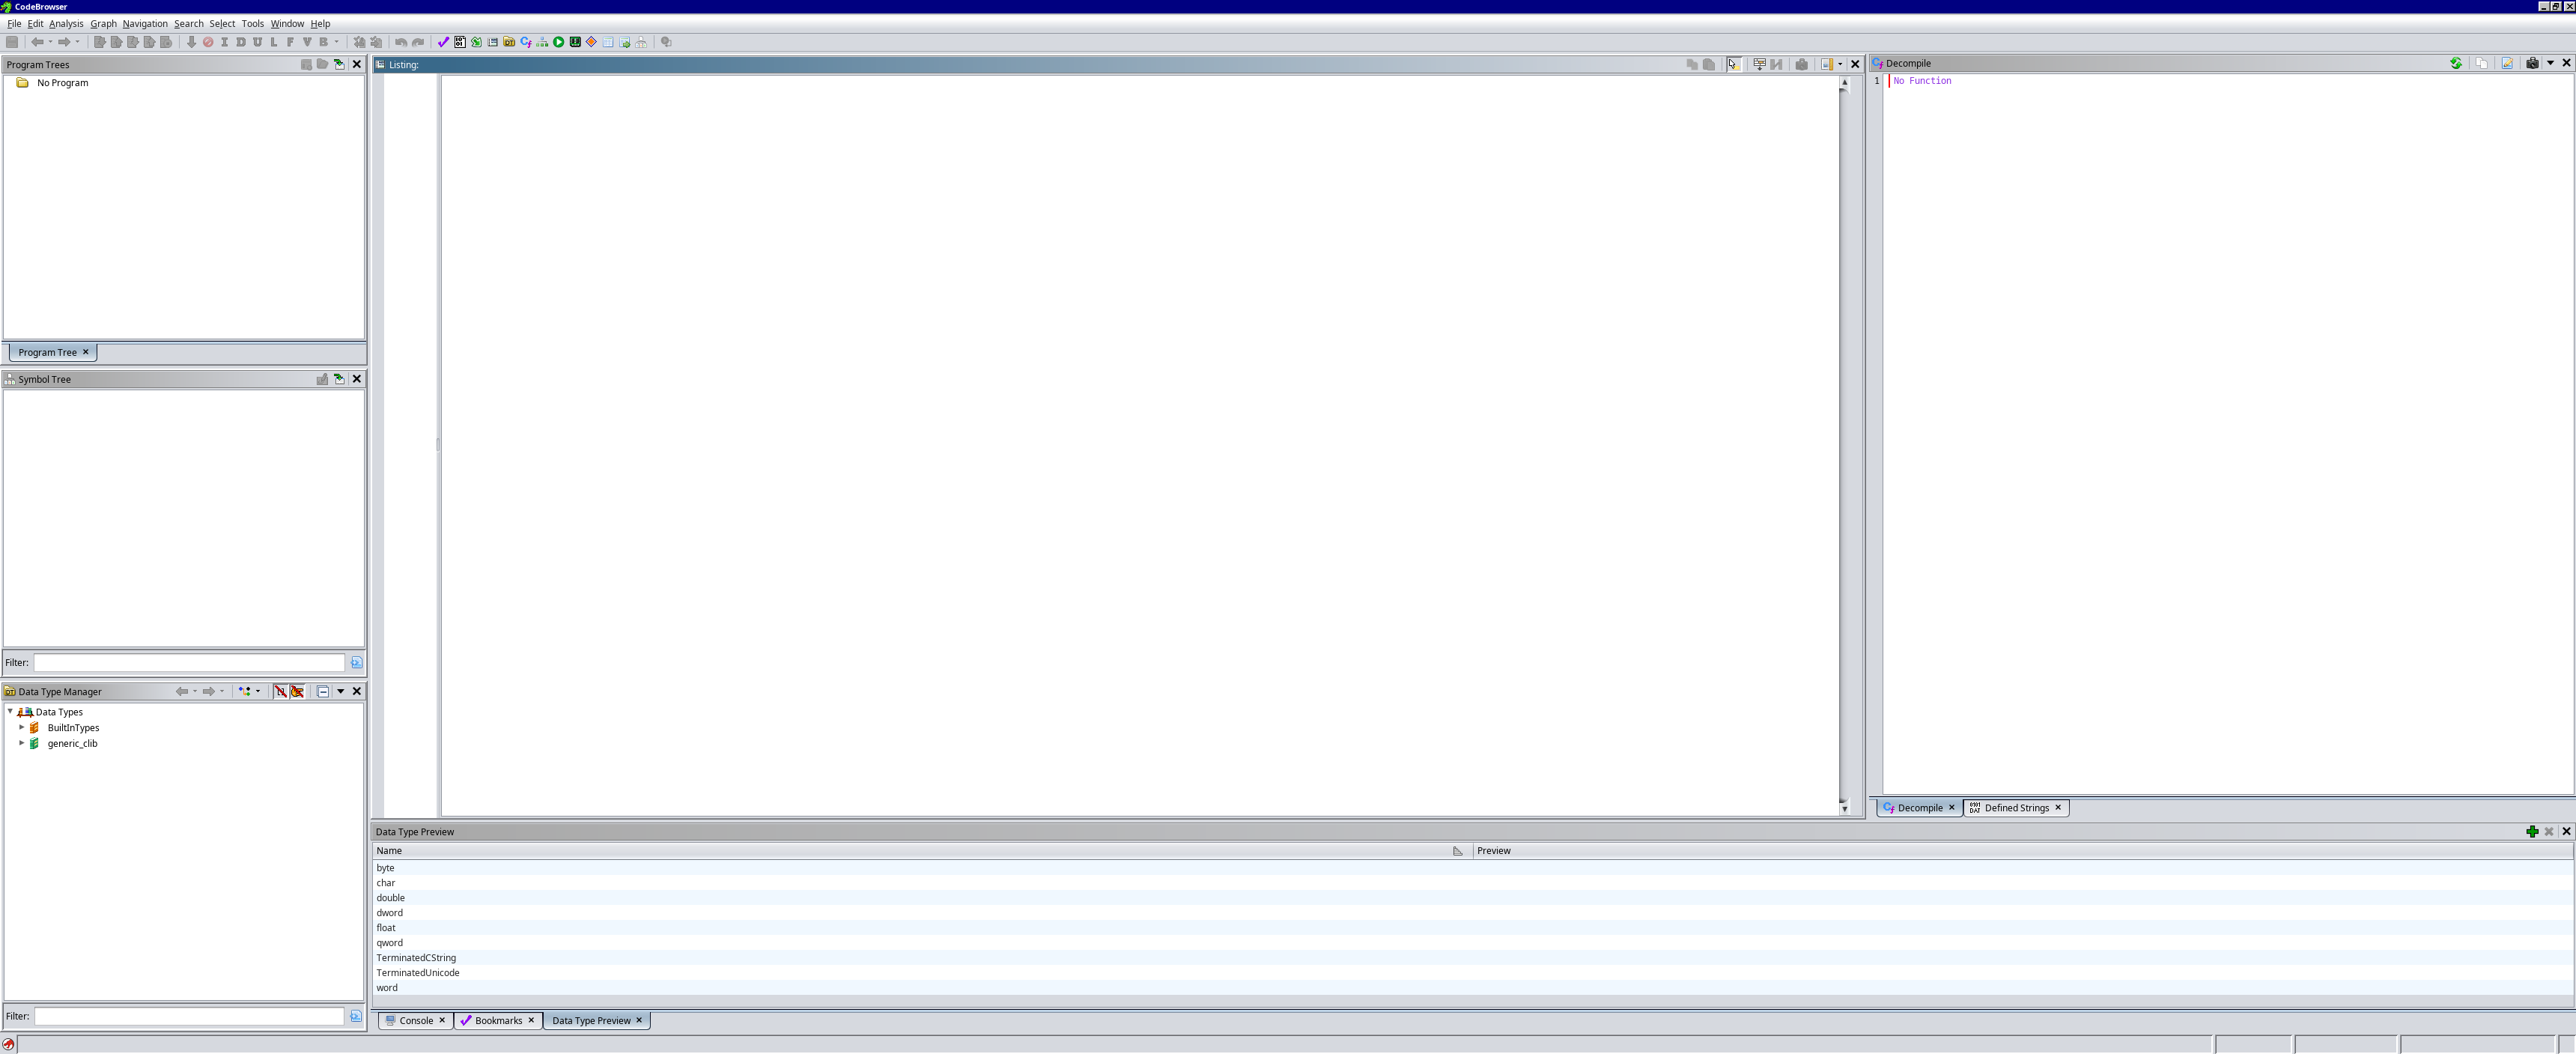
Start Ghidra.
You will then see this screen.
Click on File -> Install Extensions…
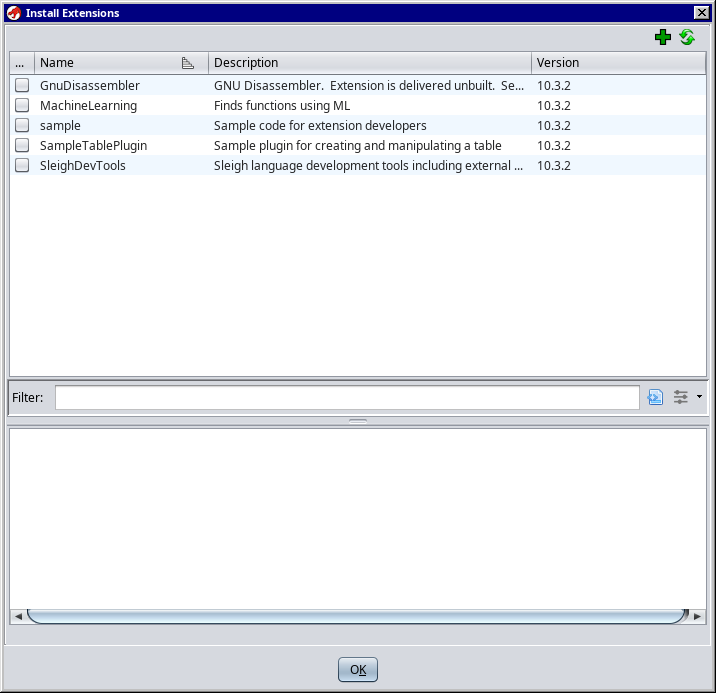
Click on the green plus sign on the top right of the new Install Extensions window and browse to the VitaLoaderRedux zip you just downloaded and select it.
Close Ghidra.
Patching VitaLoaderRedux
This is something that is not explained well and is a needed step if you want to follow. Open a file browser and go to your install of Ghidra, for example: “/home/yuki/.ghidra/.ghidra_10.3.2_DEV” Then go to “Extensions/VitaLoaderRedux/data/databases/”
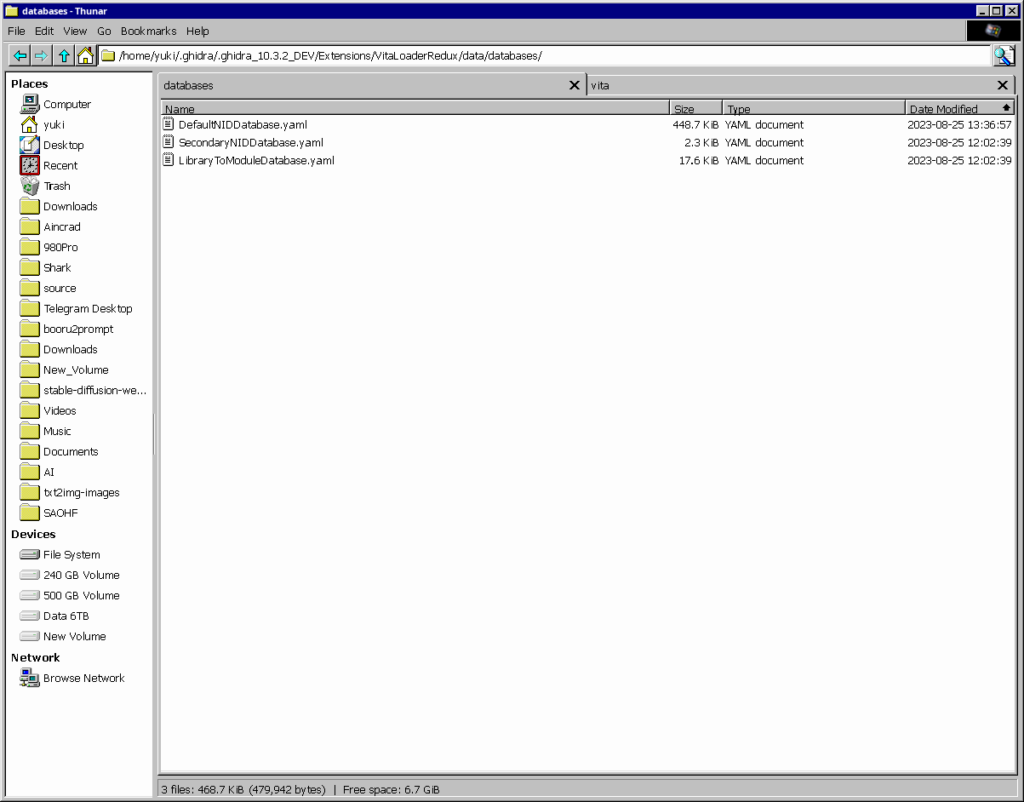
Overwrite this file with this file: DefaultNIDDatabase.yamlThis file has a lot more
Restart Ghidra.
Making a new project in Ghidra
Click on File -> New Project…
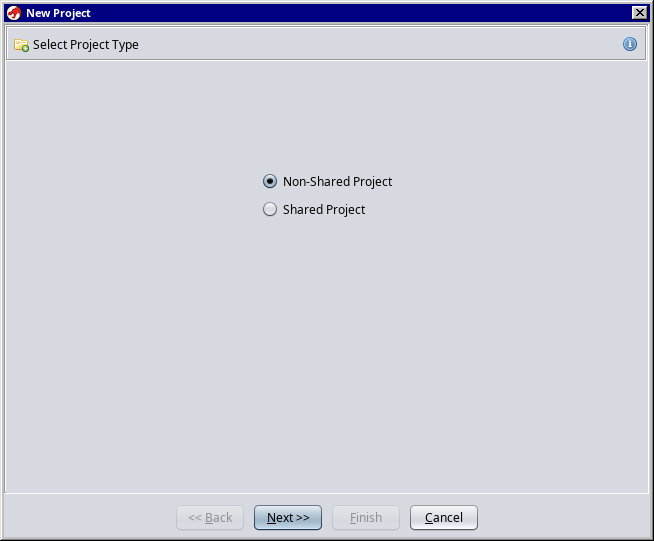
Select Non-Shared Project and click on Next.
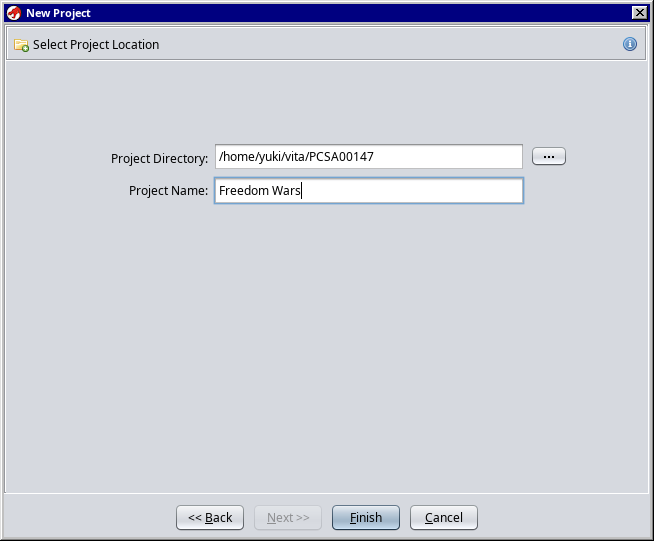
Make a new directory that will contain the current project files and give it a name.
Click on Finish.
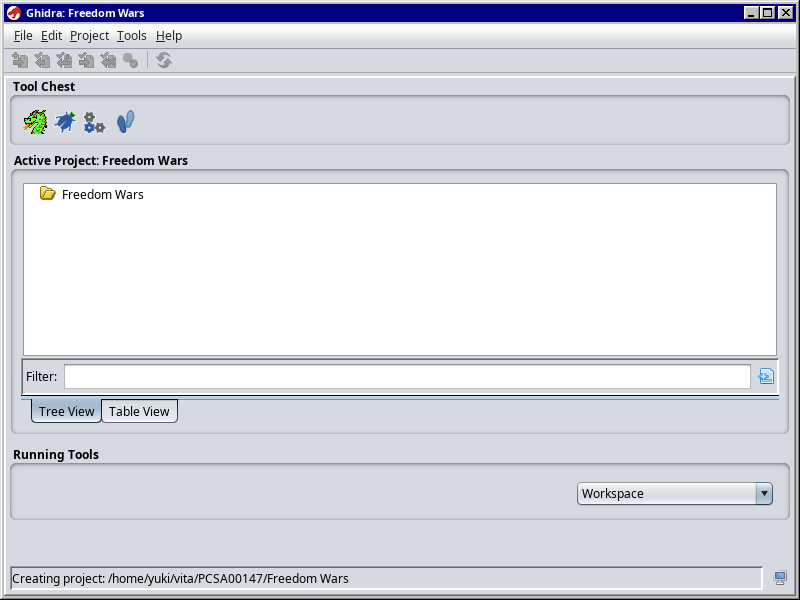
You will now be presented with this:
Click on the green dragon to start the actual program.
This is what you will be presented with next:
Importing the ELF file into Ghidra
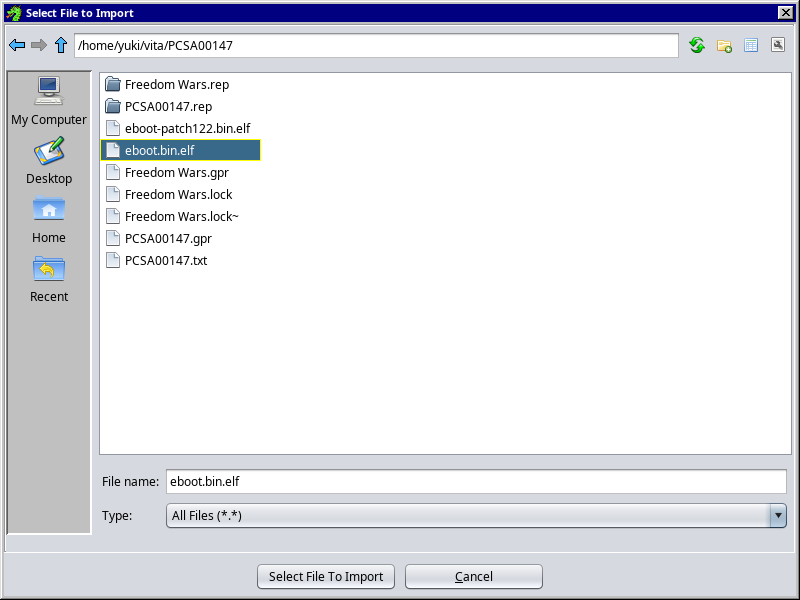
Now we are going to import the elf file we obtained via FAGDec.
Click on File -> Import File…
Navigate to the folder you saved it to and import it
Make sure the Format is set to: ARM ELF-PRX for PlayStation®Vita

Click on OK
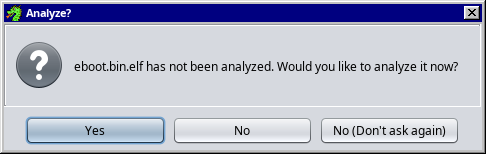
Click on Yes
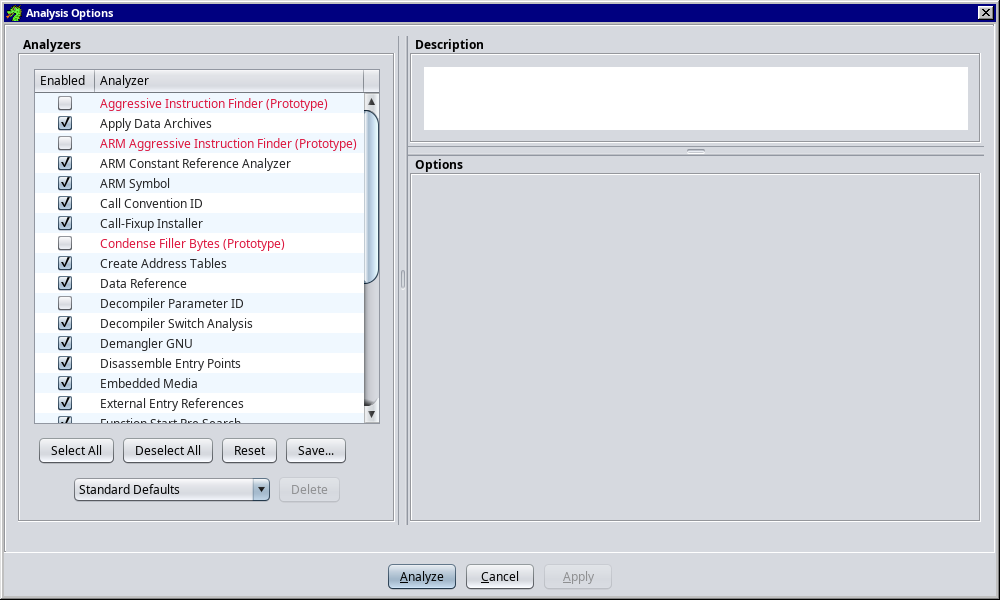
Keep defaults and click on Analyze
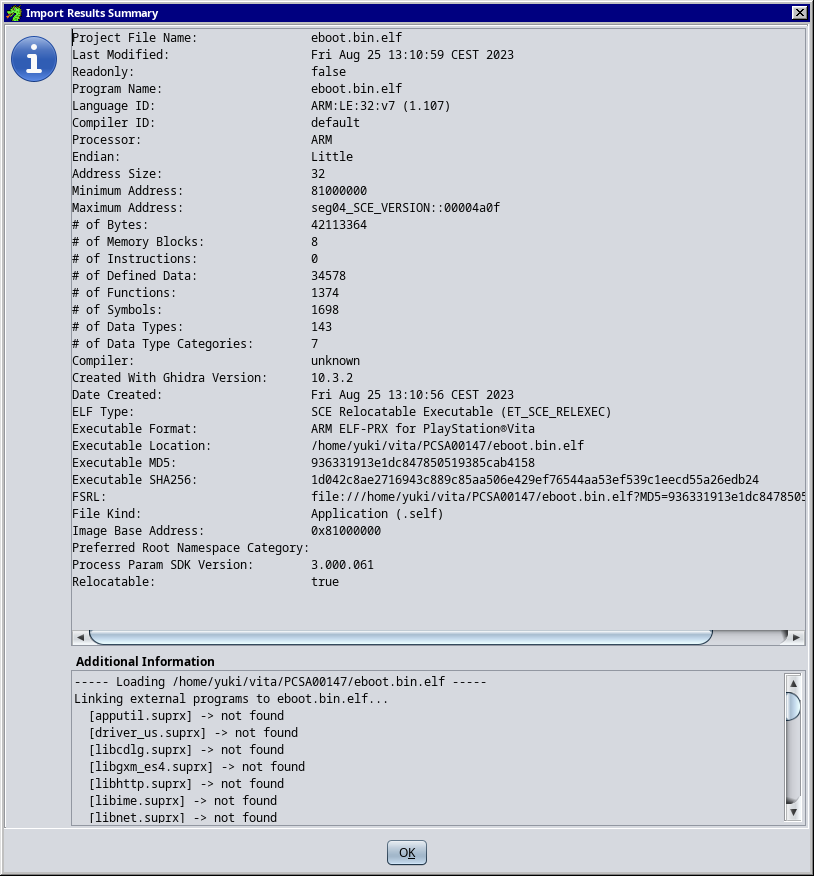
Click on OK

You will see this in the bottom right

Wait until this is completed before moving on. This can take a bit depending on your computer.
After taking a little break from the computer, it is done

Finding the codes that lock FPS
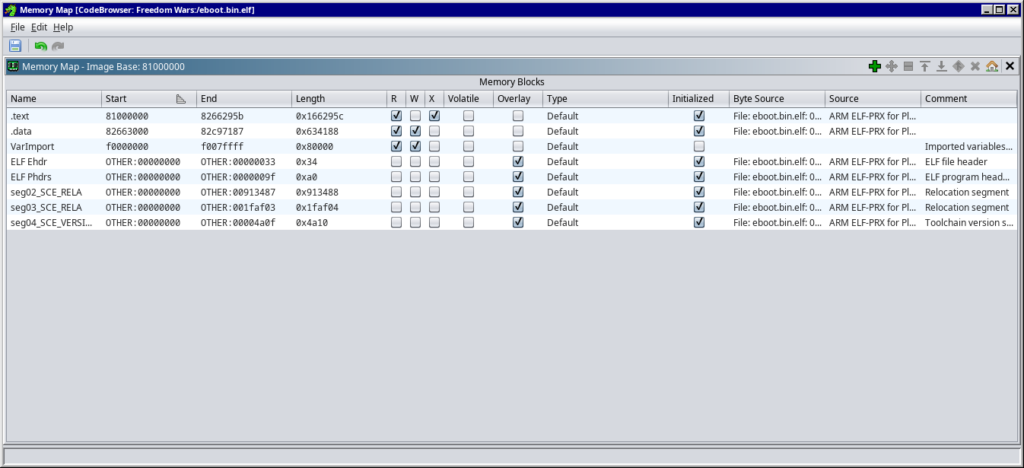
First things first, click on the Display Memory Map button

Here you will see that the first result starts at 81000000 and ends at 8266295b.
the second segment starts at 82663000 and ends at 82c97187.
Remember that these numers are
Write these numbers down somewhere, since we will need this later on.
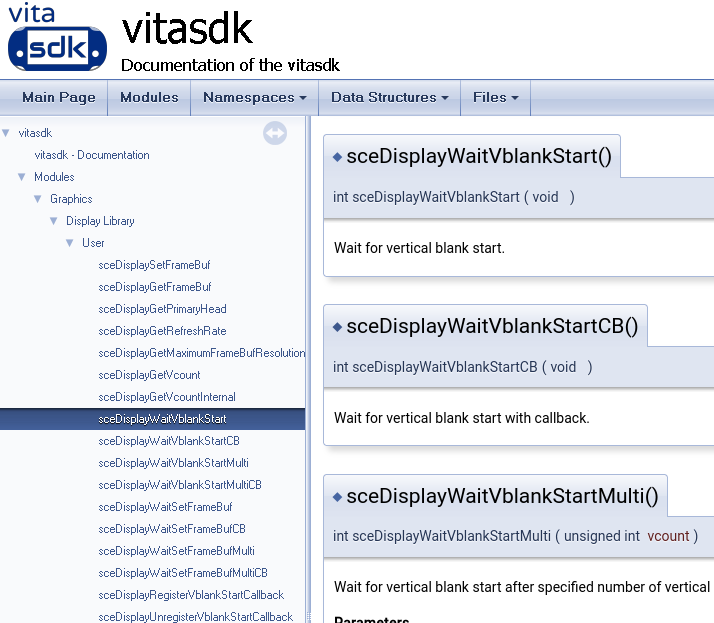
Now that everything is finally set up and ready to go, we can look for what actually locks a game to 30 FPS. Most of the time, it’s not as simple as finding a line that says: FPS=30. You usually want to find something that implements a Vsync. Let’s take a look at the VitaSDK documentation.
We can see that this function is responsible for vlank (vsync, locking to a certain screen refresh rate)
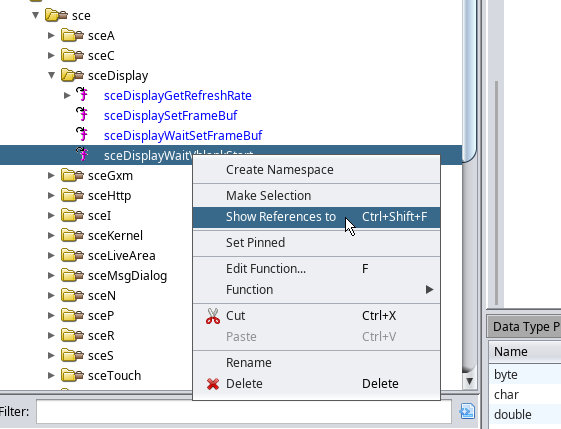
Let’s check if that function exists
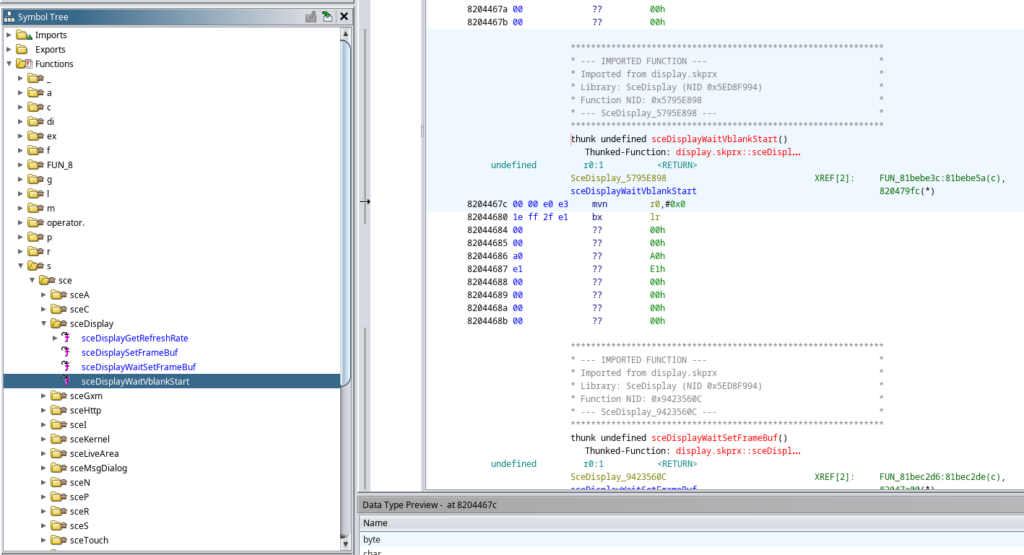
It seems like it does, now we right click the sceDisplayWaitVblankStart function on the left and select Show References to
The following screen will now popup
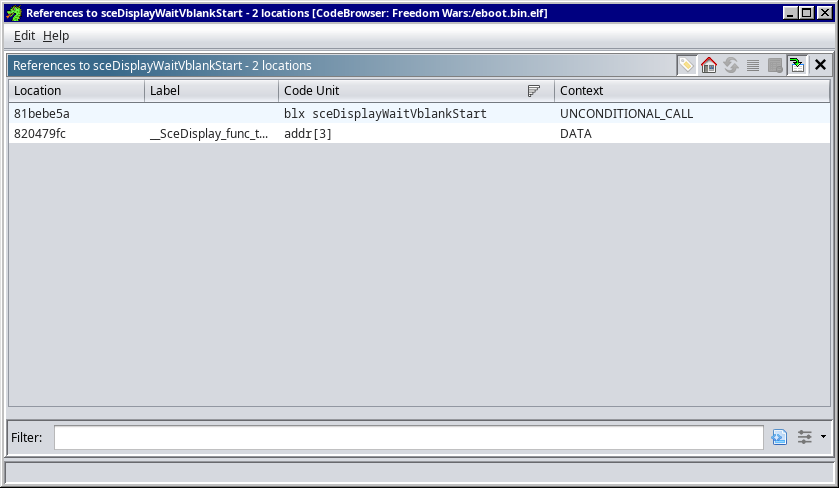
If you click on the first result (blx), Ghidra will point to the (usually) correct spot in the file.
Write down what the current address is of the line we want to nop out.
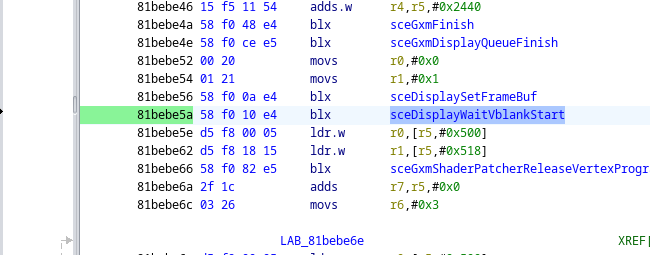
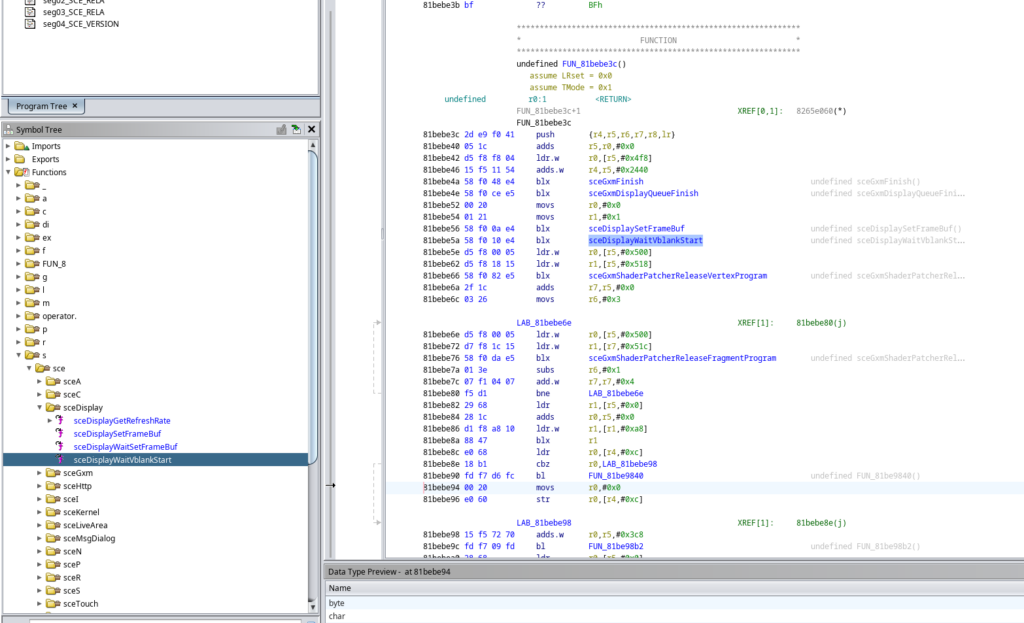
The line in my example is 81bebe5a.
Remember the Start and End we had to note down from the Memory Map? It’s time to use them.
We can see that our code is in between the first 2 numbers, segment 0.
To get the correct address for VitaGrafix, we have to do some simple math, but in hexadecimals. I use: Hex Calculator
We need to subtract the Start number with our address, so: 81000000-81bebe5a=BEBE5A
To test if it is this address, we can nop out this function.
Before we can even do anything, we need to boot the game once first so we get a log in VitaGrafix, so boot your game.
Open VitaShell on your PSVita and enable transfer mode, either USB or FTP.
Navigate to /ux0:/data/VitaGrafix and open log.txt. It should look like this:
VitaGrafix v5.0.2
=======================================
[MAIN] Title ID: PCSA00147
[MAIN] SELF: ux0:/patch/PCSA00147/eboot.bin
[MAIN] NID: 0xB8925727
=======================================
[IO] Parsing ux0:data/VitaGrafix/patch/PCSA00147.txt
[PATCH] Patching seg000 : 00C4F6B6 to C4 F2 70 21, size=4
[PATCH] Patching seg000 : 00C522D4 to 5F F4 20 7B, size=4
[PATCH] Patching seg000 : 00C522D8 to 5F F4 B8 7A, size=4
[PATCH] Patching seg000 : 00C51F62 to 5F F4 20 70, size=4
[PATCH] Patching seg000 : 00C51F6A to 5F F4 B8 75, size=4
[PATCH] Patching seg000 : 0103A348 to 5F F4 20 70, size=4
[PATCH] Patching seg000 : 0103A34E to 5F F4 B8 70, size=4
[PATCH] Patching seg000 : 0103A0F0 to 5F F4 20 71, size=4
[PATCH] Patching seg000 : 0103A0F6 to 5F F4 B8 72, size=4
[PATCH] Patching seg000 : 0069F3A2 to 5F F4 20 71, size=4
[PATCH] Patching seg000 : 0069F3A6 to 5F F4 B8 72, size=4
[PATCH] Patched 44 bytes in 11 patches and it took 3ms
[PATCH] 2 total game patches found in patch list
We want to copy the Title ID and NID.
Navigate to /ux0:/data/VitaGrafix and make a folder called patch.
In this folder, make a new file called PCSA00147.txt or whatever your game’s ID is.
Now, put in the following:
# Freedom Wars
[PCSA00147, eboot.bin, 0xB8925727] # [US, 1.22]
@FPS
0:0xC4F6B6 nop
Save the file and upload it back to the PSVita.
Now open ux0:/data/VitaGrafix/config.txt
To enable the config we just made, we add the following:
[PCSA00147]
ENABLED=1
OSD=1
FPS=60
The number 60 behind FPS won’t do anything, really. It’s just a placeholder for now.
Testing the game
Launch your game and see if it has the lock removed or not.
If it does, congratulations.
If it doesn’t, well.. You’ll have to dig some deeper into the eboot.elf file and the vita documentation. It’s not always as simple as this, something you need to nop out multiple address, or even edit them entirely.
EXTRAS
First put this file into something like:/home/yuki/.ghidra/.ghidra_10.1.5_DEV/parserprofiles/
Download the file from this GitHub link and save it as a .h file.
After that, import the following file in Ghidra by going to:
File -> Parse C Source…
and copy the settings I have down here.
- Parse Configuration: `Vita.prf`
- Source files to parse:
vitaheaders.hpp.h - Program Architecture:
MeP-c5:LE:32:CMep / default
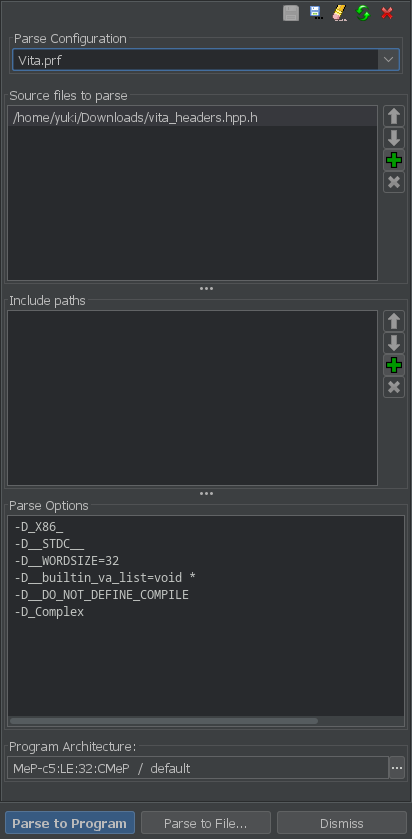
Click on Parse to Program
Click on Continue if it asks to parse the source to the elf file.
Click on Use Open Archives
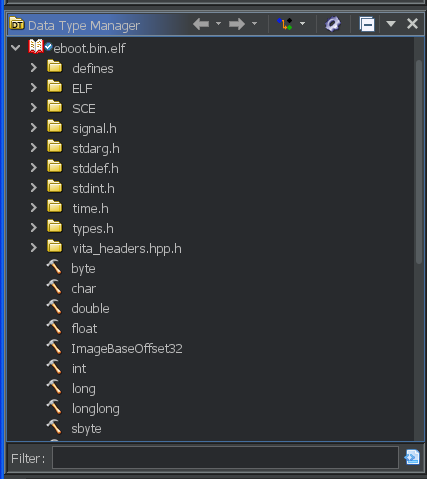
The types are now added right here:
Now it’s time link them to our NID that we analyzed before.
Add the following Jython script to Ghidra. In the top right of the new window, click on the little script icon to add a new script, click on Jython, give it a name and press ok.
Here is the script:
# Ghidra Script: Apply Function Signatures from External HPP File
# @category Functions
# @description Parses C headers and applies function signatures to symbols

from ghidra.program.model.symbol import SourceType
from ghidra.program.model.data import FunctionDefinitionDataType, ParameterDefinitionImpl
from ghidra.app.cmd.function import ApplyFunctionSignatureCmd
from ghidra.util.task import TaskMonitor
from java.util import ArrayList
import re

# Configuration
HEADER_FILE_PATH = "/home/yuki/Downloads/vita_headers.hpp"
# Set to None to process ALL matching functions, or a number to limit
MAX_FUNCTIONS_TO_PROCESS = None
DEBUG_FIRST_N = 10  # Show debug output for first N matches

# Statistics counters
stats = {
    'total_functions': 0,
    'parsed_signatures': 0,
    'exact_matches': 0,
    'fuzzy_matches': 0,
    'no_match': 0,
    'applied_successfully': 0,
    'application_failed': 0,
    'skipped': 0,
    'parse_errors': 0
}


def parse_c_function_declarations(header_path):
    """
    Parse C function declarations from header file.
    Returns dict mapping function names to their signature strings.
    """
    signatures = {}

    try:
        with open(header_path, 'r') as f:
            content = f.read()
    except Exception as e:
        print("[ERROR] Failed to read header file: {}".format(str(e)))
        return signatures

    # Remove comments
    content = re.sub(r'/\*.*?\*/', '', content, flags=re.DOTALL)
    content = re.sub(r'//.*?$', '', content, flags=re.MULTILINE)

    # Match function declarations
    # Pattern: return_type function_name(params);
    func_pattern = r'^\s*(?:extern\s+)?(?:static\s+)?(\w+(?:\s*\*)*)\s+(\w+)\s*\((.*?)\)\s*;'

    matches = re.finditer(func_pattern, content, re.MULTILINE)

    for match in matches:
        return_type = match.group(1).strip()
        func_name = match.group(2).strip()
        params = match.group(3).strip()

        # Skip forward declarations like struct/typedef
        if return_type in ['typedef', 'struct', 'union', 'enum']:
            continue

        # Store the full signature
        signature = "{} {}({})".format(return_type, func_name, params)
        signatures[func_name] = {
            'return_type': return_type,
            'params': params,
            'full_signature': signature
        }

        print("[PARSE] Found: {}".format(signature))

    print("[INFO] Parsed {} function signatures from header".format(len(signatures)))
    stats['parsed_signatures'] = len(signatures)

    return signatures


def parse_parameter_type(param_str):
    """
    Parse a parameter string to extract type and name.
    Returns (type_str, param_name)
    """
    param_str = param_str.strip()

    # Handle void or empty parameters
    if not param_str or param_str == 'void':
        return (None, None)

    # Handle ellipsis (varargs)
    if param_str == '...':
        return ('...', 'varargs')

    # Try to split type and name
    # Look for the last word as the parameter name
    parts = param_str.rsplit(None, 1)

    if len(parts) == 1:
        # No name, just type (or complex pointer type)
        return (parts[0], None)

    type_part = parts[0]
    name_part = parts[1]

    # Handle array syntax like "int array[]"
    if '[' in name_part:
        name_part = name_part.split('[')[0]

    # Handle pointer syntax attached to name like "*ptr"
    while name_part.startswith('*'):
        type_part += '*'
        name_part = name_part[1:]

    return (type_part.strip(), name_part.strip() if name_part else None)


def parse_type_to_ghidra(type_str, dtm):
    """
    Convert a C type string to a Ghidra DataType.
    """
    if not type_str:
        return dtm.getDataType("/void")

    type_str = type_str.strip()

    # Handle pointer types
    pointer_count = type_str.count('*')
    base_type = type_str.replace('*', '').strip()

    # Remove type qualifiers (const, volatile, restrict, etc.)
    qualifiers = ['const', 'volatile', 'restrict', 'signed', 'unsigned']
    words = base_type.split()
    filtered_words = []

    # Keep "unsigned" when it's part of types like "unsigned int", "unsigned char"
    for i, word in enumerate(words):
        if word in qualifiers:
            # Keep "unsigned" if followed by a type word
            if word == 'unsigned' and i + 1 < len(words) and words[i + 1] in ['int', 'char', 'short', 'long']:
                filtered_words.append(word)
            # Skip other qualifiers
            continue
        else:
            filtered_words.append(word)

    base_type = ' '.join(filtered_words) if filtered_words else base_type

    # Search for the type in Ghidra's data type manager
    dt = None

    # Try 1: Direct match with "/" prefix
    dt = dtm.getDataType("/" + base_type)

    # Try 2: Search all data types by name (case-sensitive)
    if dt is None:
        all_types = dtm.getAllDataTypes()
        for candidate in all_types:
            if candidate.getName() == base_type:
                dt = candidate
                break

    # Try 3: Common C type mappings
    if dt is None:
        type_map = {
            'void': '/void',
            'int': '/int',
            'char': '/char',
            'unsigned char': '/uchar',
            'short': '/short',
            'unsigned short': '/ushort',
            'long': '/long',
            'unsigned long': '/ulong',
            'float': '/float',
            'double': '/double',
            'size_t': '/size_t',
            'uint8_t': '/uint8_t',
            'uint16_t': '/uint16_t',
            'uint32_t': '/uint32_t',
            'uint64_t': '/uint64_t',
            'int8_t': '/int8_t',
            'int16_t': '/int16_t',
            'int32_t': '/int32_t',
            'int64_t': '/int64_t',
            'SceUID': '/int',
            'SceSize': '/uint',
            'SceBool': '/int',
            'unsigned int': '/uint'
        }

        type_path = type_map.get(base_type)
        if type_path:
            dt = dtm.getDataType(type_path)

    # Try 4: Search case-insensitively as last resort
    if dt is None:
        base_type_lower = base_type.lower()
        all_types = dtm.getAllDataTypes()
        for candidate in all_types:
            if candidate.getName().lower() == base_type_lower:
                dt = candidate
                print(
                    "[INFO] Found type '{}' via case-insensitive search".format(base_type))
                break

    if dt is None:
        # Default to undefined if we can't find the type
        print("[WARN] Unknown type '{}', using undefined".format(base_type))
        dt = dtm.getDataType("/undefined")

    # Apply pointer levels
    for i in range(pointer_count):
        dt = dtm.getPointer(dt)

    return dt


def create_function_definition(func_info, dtm):
    """
    Create a Ghidra FunctionDefinition from parsed signature info.
    Returns FunctionDefinitionDataType or None on error.
    """
    try:
        func_name = func_info['name']
        return_type_str = func_info['return_type']
        params_str = func_info['params']

        # Parse return type
        return_dt = parse_type_to_ghidra(return_type_str, dtm)

        # Create function definition
        func_def = FunctionDefinitionDataType(func_name)
        func_def.setReturnType(return_dt)

        # Parse parameters
        if params_str and params_str.strip() and params_str.strip() != 'void':
            param_list = []

            # Split parameters carefully (handle commas inside parentheses)
            params = []
            paren_depth = 0
            current_param = []

            for char in params_str + ',':
                if char == ',' and paren_depth == 0:
                    if current_param:
                        params.append(''.join(current_param).strip())
                        current_param = []
                else:
                    if char == '(':
                        paren_depth += 1
                    elif char == ')':
                        paren_depth -= 1
                    current_param.append(char)

            # Process each parameter
            for param in params:
                if not param:
                    continue

                param_type_str, param_name = parse_parameter_type(param)

                if param_type_str is None:
                    continue

                # Handle varargs
                if param_type_str == '...':
                    func_def.setVarArgs(True)
                    continue

                param_dt = parse_type_to_ghidra(param_type_str, dtm)

                if param_name:
                    param_def = ParameterDefinitionImpl(
                        param_name, param_dt, None)
                else:
                    param_def = ParameterDefinitionImpl(None, param_dt, None)

                param_list.append(param_def)

            if param_list:
                func_def.setArguments(param_list)

        return func_def

    except Exception as e:
        print("[ERROR] Failed to create function definition: {}".format(str(e)))
        stats['parse_errors'] += 1
        return None


def find_matching_function_sig(func_name, parsed_signatures, debug=False):
    """
    Find a matching function signature using pattern matching.
    Returns (match_type, signature_info) or (None, None).
    """
    if debug:
        print("[DEBUG] Searching for match: '{}'".format(func_name))
        print("[DEBUG] Sample signatures available: {}".format(
            ', '.join(list(parsed_signatures.keys())[:10])))

    # Try exact match first
    if func_name in parsed_signatures:
        if debug:
            print("[DEBUG] Found exact match!")
        return ('exact', parsed_signatures[func_name])

    # Try case-insensitive match
    func_name_lower = func_name.lower()
    for sig_name, sig_info in parsed_signatures.items():
        if sig_name.lower() == func_name_lower:
            if debug:
                print("[DEBUG] Found case-insensitive match: '{}'".format(sig_name))
            return ('case_insensitive', sig_info)

    # Try partial matching
    for sig_name, sig_info in parsed_signatures.items():
        if func_name in sig_name or sig_name in func_name:
            if debug:
                print("[DEBUG] Found partial match: '{}'".format(sig_name))
            return ('partial', sig_info)

    if debug:
        print("[DEBUG] No match found")

    return (None, None)


def apply_signature_to_function(function, func_info, dtm):
    """
    Apply a parsed function signature to a Ghidra function.
    Returns True if successful, False otherwise.
    """
    try:
        # Create function definition from parsed info
        func_info_with_name = {
            'name': function.getName(),
            'return_type': func_info['return_type'],
            'params': func_info['params']
        }

        func_def = create_function_definition(func_info_with_name, dtm)

        if func_def is None:
            return False

        # Use ApplyFunctionSignatureCmd to apply the signature
        cmd = ApplyFunctionSignatureCmd(
            function.getEntryPoint(),
            func_def,
            SourceType.USER_DEFINED
        )

        success = cmd.applyTo(currentProgram, TaskMonitor.DUMMY)

        if success:
            print("[SUCCESS] Applied signature to {}: {}".format(
                function.getName(),
                func_info['full_signature']
            ))
            return True
        else:
            error_msg = cmd.getStatusMsg() if hasattr(
                cmd, 'getStatusMsg') else "Unknown error"
            print("[ERROR] Failed to apply signature to {}: {}".format(
                function.getName(),
                error_msg
            ))
            return False

    except Exception as e:
        print("[ERROR] Exception applying signature to {}: {}".format(
            function.getName(),
            str(e)
        ))
        import traceback
        traceback.print_exc()
        return False


def process_all_functions(parsed_signatures):
    """
    Process all functions in the program and apply matching signatures.
    """
    function_manager = currentProgram.getFunctionManager()
    functions = function_manager.getFunctions(True)
    dtm = currentProgram.getDataTypeManager()

    limit_msg = "ALL" if MAX_FUNCTIONS_TO_PROCESS is None else str(
        MAX_FUNCTIONS_TO_PROCESS)
    print("\n[INFO] Starting to process functions (limit: {})...".format(limit_msg))
    print("=" * 80)

    processed_count = 0
    skipped_count = 0

    for function in functions:
        stats['total_functions'] += 1
        func_name = function.getName()

        # Don't skip thunks - they're imported function stubs that need signatures!
        # if function.isThunk():
        #     stats['skipped'] += 1
        #     skipped_count += 1
        #     continue

        # Skip auto-generated function names (FUN_* and caseD_*)
        if func_name.startswith('FUN_') or func_name.startswith('caseD_'):
            stats['skipped'] += 1
            skipped_count += 1
            continue

        # Show first 10 function names to debug filtering
        if stats['total_functions'] <= 10:
            print("[DEBUG] Found function: {} (starts with sce: {})".format(
                func_name, func_name.startswith('sce')))

        # Stop after processing limit (if set)
        if MAX_FUNCTIONS_TO_PROCESS is not None and processed_count >= MAX_FUNCTIONS_TO_PROCESS:
            print("\n[INFO] Reached processing limit of {} functions".format(
                MAX_FUNCTIONS_TO_PROCESS))
            break

        processed_count += 1

        # Add debug output for first N functions
        debug_mode = (processed_count <= DEBUG_FIRST_N)

        if debug_mode:
            print("\n[DEBUG {}] Processing: {}".format(
                processed_count, func_name))
            print("[DEBUG] Address: {}".format(function.getEntryPoint()))

        # Try to find matching function signature
        match_type, sig_info = find_matching_function_sig(
            func_name, parsed_signatures, debug=debug_mode)

        if match_type is None:
            stats['no_match'] += 1
            if debug_mode:
                print("[DEBUG] Result: NO MATCH")
            continue

        # Track match type
        if match_type == 'exact':
            stats['exact_matches'] += 1
            print("[EXACT MATCH] Found signature for: {}".format(func_name))
        elif match_type == 'case_insensitive':
            stats['fuzzy_matches'] += 1
            print("[FUZZY MATCH] Case-insensitive match for: {}".format(func_name))
        else:  # partial
            stats['fuzzy_matches'] += 1
            print("[FUZZY MATCH] Partial match for: {}".format(func_name))

        # Apply the signature
        if apply_signature_to_function(function, sig_info, dtm):
            stats['applied_successfully'] += 1
        else:
            stats['application_failed'] += 1


def print_statistics():
    """
    Print final statistics about the operation.
    """
    print("\n" + "=" * 80)
    print("SUMMARY STATISTICS")
    print("=" * 80)
    print("Signatures parsed from HPP:   {}".format(
        stats['parsed_signatures']))
    print("Parse errors:                 {}".format(stats['parse_errors']))
    print("Total functions processed:    {}".format(stats['total_functions']))
    print("Exact matches found:          {}".format(stats['exact_matches']))
    print("Fuzzy matches found:          {}".format(stats['fuzzy_matches']))
    print("No match found:               {}".format(stats['no_match']))
    print("Signatures applied:           {}".format(
        stats['applied_successfully']))
    print("Application failed:           {}".format(
        stats['application_failed']))
    print("Skipped (thunks):             {}".format(stats['skipped']))
    print("=" * 80)

    # Calculate success rate
    total_matches = stats['exact_matches'] + stats['fuzzy_matches']
    if total_matches > 0:
        success_rate = (stats['applied_successfully'] * 100.0) / total_matches
        print("\nSuccess rate: {:.2f}%".format(success_rate))


def main():
    """
    Main execution function.
    """
    print("\n" + "=" * 80)
    print("GHIDRA FUNCTION SIGNATURE MAPPER (HPP Parser)")
    print("=" * 80)
    print("Program: {}".format(currentProgram.getName()))
    print("Header: {}".format(HEADER_FILE_PATH))
    print("=" * 80 + "\n")

    # Start a transaction for undo capability
    transaction_id = currentProgram.startTransaction(
        "Apply Function Signatures from HPP")

    try:
        # Parse function declarations from header file
        print("[INFO] Parsing header file...")
        parsed_signatures = parse_c_function_declarations(HEADER_FILE_PATH)

        if len(parsed_signatures) == 0:
            print("[WARNING] No function signatures found in header file!")
            print("[WARNING] Check the file path and format.")
            currentProgram.endTransaction(transaction_id, False)
            return

        # Process all functions
        process_all_functions(parsed_signatures)

        # Print statistics
        print_statistics()

        # Commit the transaction
        currentProgram.endTransaction(transaction_id, True)
        print("\n[INFO] Transaction committed successfully.")

    except Exception as e:
        # Rollback on error
        currentProgram.endTransaction(transaction_id, False)
        print("\n[ERROR] Transaction rolled back due to error:")
        print(str(e))
        import traceback
        traceback.print_exc()


# Run the script
if __name__ == "__main__":
    main()
Now save and run the script.
Done!
Filed under: Reverse Engineering - @ August 25, 2023 12:57 pm
Tags: ghidra, hacking, vita, vitagrafix